Category Archives: General gardening

Fall Gardening in the Grand Valley

Fall in the Grand Valley:  leaves turning, rabbit brush blooming, a few chilly nights. Apples have replaced peaches at farm stands. The Mesa has had its first dusting of snow.  Color Sunday has come and gone, and it’s time to prepare your gardens for winter and a strong start for next spring. Here’s your to do list for these last few warm days:

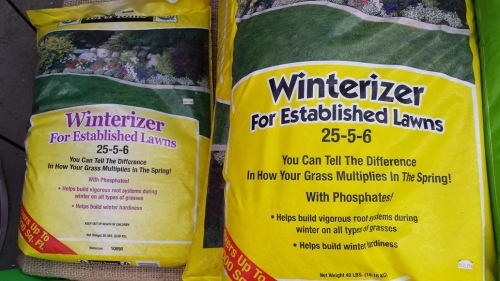
Your lawn. A healthy lawn is more resistant to disease and insects. Prepare it for winter survival, and a strong start next spring with Winterizer from Fertilome.

20161012_143419

Your veggie garden and other annual plants. Once frost has toasted your annuals, it’s time to pull them up. If you’ve had issues with disease or insects in those plants, bag them for the trash. Otherwise, they’re good to compost. Pulling dead plants out lessens the areas problem bugs have to overwinter. This is especially important for your squash plants—pulling and disposing of the dead plant material is the first step toward fewer squash bugs next season.

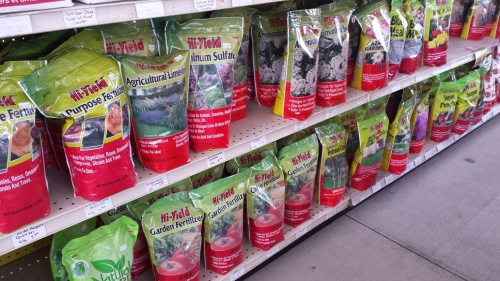
When veggie beds are cleaned of dead plant material, now is a great time to lay down a layer of compost and turn it in, or plant a cover crop, like winter rye. Veggies are heavy feeders, transferring soil nutrients to those peppers and tomatoes you’ve been enjoying. Amending your soil helps return nutrients to the soil as well as improving soil texture and water retention.

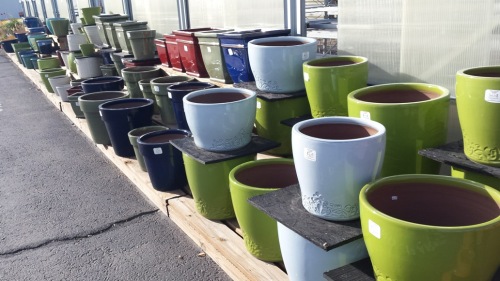
If you have ceramic glazed pottery, it’s a good idea to remove the soil, or move pot and soil to a place where they will not get wet. Wet soil freezes and thaws during the winter and can crack the glaze of your pretty pots.

20161012_163850

Many annual plants, such as marigolds, make seeds that can be collected when dry. Collect these, removing leaves and stems, and store them in labeled Ziploc bags in your fridge to plant next spring after frost danger has passed.

You can also save seed from heirloom tomatoes. There is a bit of a process to follow for success, but totally do-able. This video explains the process clearly.

Potted tropical plants, like hibiscus, jasmine, and geraniums can be brought inside for the winter. Before frost, check them for insects, and treat them with a systemic insecticide to be safe. When inside, place them in a bright sunny room, and water as needed, fertilizing once a month.

Dahlias, gladiolus and other tender, summer-flowering bulbs must be lifted out of the ground. Brush off excess soil and store in a cool, dark, dry place until next spring. Replant them when frost danger has passed.

Perennials. Unless you have perennials you keep in your garden to provide seeds, shelter for winter birds, or those you like for structure or interest in the winter garden, now is a good time to trim them back and prune out dead stems.

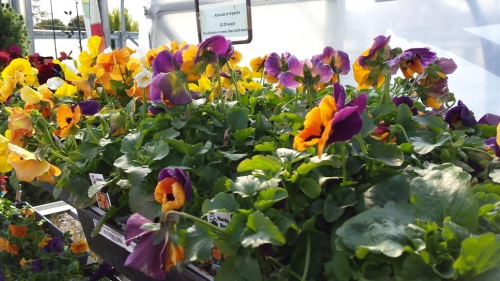
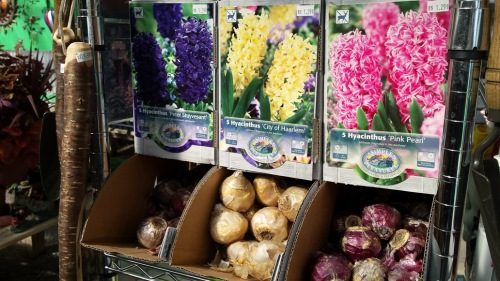
Fall planting. Fall’s cooler weather makes it a great time to plant! Trees, shrubs and roses are often found at sale prices. Be sure to amend the soil as you plant and use a root stimulator to encourage strong root growth prior to winter. It’s also a great time to plant perennials, pansies and spring-flowering bulbs like tulips, daffodils, and hyacinths. Pansies often reseed themselves and sometimes will even survive the winter to provide color next spring. Salad greens and root crops can survive a light frost and extend your garden season, especially inside a cold frame.

20161012_14351820161012_143540

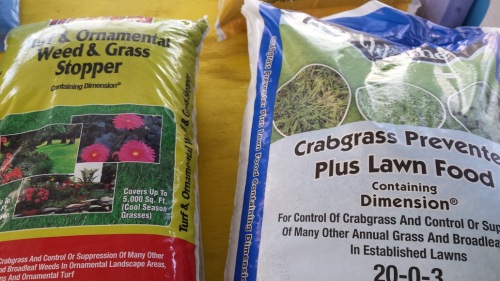
Weeds. Continue your weeding vigilance until they are well and truly dead. Weeds, unlike desirable plants, can tolerate a pretty hard frost. Weeding done now makes next spring’s weeding a bit easier. You might also consider putting down a preemergent and watering it in to smother weed seeds laying in wait in the soil.

20161012_163625

Leaves. Rake up leaves and compost or dispose of them, or use a mulching mower to chop them into tiny pieces. Leaving them on the lawn invites fungus and insects. This is the same reason to not use them to mulch your perennials. Leaves have a tendency to layer and pack down, holding in moisture that can rot a perennial.

Rain barrels. Now that Colorado allows for their use, keep in mind that they can split when they freeze. Empty them, clean them of any residual algae or mud, and store them for the winter.

Garden tools. Clean tools and apply a light layer of oil to prevent rust. Store them where you can find them easily next spring!

20161012_163427-2

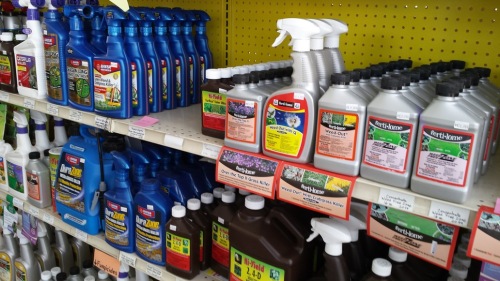
Chemicals. Even organic gardeners have some sort of fertilizer and bug killer around. Most chemicals are good season to season if stored properly. Liquids must be prevented from freezing—freezing draws water out of the solution and will not properly go back into the solution when thawed, making your chemical ineffective. Dry or granular chemicals should be protected from moisture. Plastic bins work great for this. Be sure to leave all chemicals in their original containers.

20161012_16345620161012_163440

When the snow flies, you can sit back and enjoy, knowing your garden has been safely tucked in for the winter. Anticipate the next season by keeping track of what worked and didn’t this year and making plans for next season. Seed catalogs and a new gardening season will be here before you know it! Your friends at MGG will be here to help, starting in mid-March!

Leave a comment

Filed under amendments, General gardening, pests, soil

Create a Magical Birdbath Fairy Garden

Birdbaths just don’t last forever.  I inherited a very beautiful, and very heavy birdbath from friends a few years ago.  It had a teeny-tiny crack, which resulted in a teeny-tiny slow leak, but no biggie.  Once I had it wrangled into a location near a happy snow berry shrub, I knew it was there to stay.  Until this spring.  When I filled it with water and all the water just ran out the bottom.  The snow berry cheered–“extra water for me!”  I frowned and started thinking of how to save it.  Find a sealer?  Patch it with concrete?  Then while cruising Pinterest, the solution happened.  This birdbath, now with drainage, wanted to be a fairy garden.  Indeed, it’s never been more lovely.

20150502_124610

To get started, I piled some gravel in the bottom to assist in drainage, and then filled the bowl with good quality potting soil.  (I’m a huge fan of Happy Frog products, so I used Happy Frog Potting Soil.)

20150428_142904

20150428_143029

Then off to Mt. Garfield Greenhouse to collect plants.  I walked the aisles and tried to think like a fairy might.  Which flowers would fairies enjoy?  I ended up with a selection that included some penstemon, vinca, vinca vine, alyssum, scavola, and a pretty petunia.  I also collected a few other annual flowers for filling in.  I hate to not have enough and not be able to finish my projects.  I’m an immediate gratification sort of gardener.  20150502_114822

I got my pretty selections home, collected my fairies and fairy stuff from the house where they’d been over-wintering in my houseplants, and set up camp by the birdbath.  I have accumulated a nice collection of fairy stuff over the years.  This year adding a couple of fairies and my new favorite fairy accessory–the fairy hatch!  A tree trunk that opens up to reveal glittery spiral stairs!  Squeeee!

20150502_121153

I set the larger fairy structures in place and then arranged plants around them (still in their pots) to see what would fit and give me the magical little garden I was hoping for.  I left a space in the middle, thinking some sort of path should be there.  When I got the look I was after, I potted the plants in the bowl, filling in with my back-up plants to really fill it out.

20150502_114805

Then I placed the fairies and smaller accessories, and built a little garden path from pink shale borrowed from the rock expanses of my yard.  (I live in an area with very poor soil, so most of my “yard” is rocked.)  Some of the smaller accessories are purchased, but some are scavenged and “found” objects.  Add to your fairy garden by looking for shiny things that a fairy might find and bring home, pretty rocks, or maybe shells.  Use your imagination in their placement, creating their purpose.  A teepee stack of mulch chips could be a firepit.  A large shell filled with water could be a pond.

20150502_123157

I think my birdbath fairy garden turned out quite nicely.

20150502_121245

20150502_123429

20150502_123523

It was immediately visited by a hummingbird and a bumblebee.  A garden spider had taken up residence by the afternoon.

20150502_184805

The fairies are happy.

For more inspiration cruise our Fairy Gardens and Miniature Gardens board on Pinterest, and the Fairy Garden page on our website.

Leave a comment

Filed under fairy gardening, General gardening, soil

Gardening with Ollas

I, like most gardeners, like to try new things in my garden.  This year Mt. Garfield Greenhouse carried a new product that represented old-school technology–the Olla (pronounced oy-ya)–from Dripping Springs Ollas.  Ollas have been used by native cultures for decades as a way to farm crops in dry areas.  The idea is to bury an unglazed terra cotta vessel, fill it with water, and let that water move through the vessel into the soil to water plants around it.

I don’t have irrigation water, so I must use domestic water in order to garden.  My husband set up a mini-soaker hose system in our raised beds, operated on a timer to water the garden 3 days a week, once in the early morning, and again in the late evening.  The system works great to conserve water, and is enough for great plant growth and productivity.  However, in the scorching summer heat, the soil doesn’t stay as evenly moist as tomatoes would like, resulting in blossom end rot on the fruit.  This year, I wanted to see if ollas could help with maintaining soil moisture through the hot season.  So, at the start of the season, I purchased four ollas for the two 8×4 raised beds I planned for tomatoes this year–two ollas per bed.

I buried them up to their necks about a foot and a half in from the ends and centered from the sides, filled them with water and replaced their lids.

plant up to neck

Tomatoes and marigolds were planted around them.

plant around it

2 in a 4x8 garden

The hardest part about using ollas, was that my plants got so huge it was hard to find the ollas to fill them!  At the end of the season, I pulled the plants and uncovered the ollas.

uncover

Check out the roots growing around the neck of this olla–all the ollas had roots growing to them like this–the plants LOVED having this water source!

roots at top

Here’s a look at the roots surrounding the bottom of the olla.

roots at bottom

Roots had actually become attached to the ollas, and stayed on them after I pulled them out.

clinging roots

I let the ollas sun-dry on my deck for a few days, and I’m storing them in the garage for the winter to prevent freezing and cracking.

drying out

The result?  Blossom end rot almost non-existant!  Hurray!  I’m buying more ollas for the rest of my garden beds next spring.  Ollas help me keep soil moist and plants happy even on the hottest days.  I had a great tomato crop this year, with minimal loss due to blossom end rot–the only rot happened when the ollas dried out when I was out of town for a couple weeks.  Because my gardens are on a watering system, I filled the ollas every other week or so.  If you plan to use ollas as your only watering source–something that really works–you’ll need to fill them more often.  Soil composition and drainage as well as soil and air temperature will affect how often you’ll need to fill them.  Ollas can also be used in large container gardens!

See Mt. Garfield Greenhouse for ollas for YOUR gardens next spring!

5 Comments

Filed under drought, General gardening, soil, tomatoes, water-wise landscaping

Heidi Mae’s Garden: Late Winter, Early Spring

The Vernal Equinox is tomorrow, March 20, 2014.  Spring brings hope for a planting season to come, but here on the Western Slope, Winter hangs around in the shadows and promises at least a few more hard frosts and possible snow.  Still, warmer days invite a gardener outside.  Gardens can be cleaned of last year’s litter, soil can be turned and amended, perennials can be trimmed back, and you might be rewarded with a few slivers of green.

I went on a search for a bit of green earlier this week, and found cilantro had sprouted from last year’s seeds.

cilantro

Perennial herbs like tarragon, chives, garlic chives and parsley were peeking out.  Parsley is a biennial.  The first year it makes leaves, and in the second year, it will bloom this year, set seeds and die.  No amount of plucking off the bloom stems will stop it.

tarragon

chives

garlic chives

parsley

My rhubarb is looking great, strawberries overwintered really well this year, and the hops vine I had hoped to contain in a wooden planter (hops will NOT be contained!) is showing a few green tips.rhubarb

strawberry

hops

I’m looking forward to getting my beds amended and a few cool season crops like potatoes and peas planted in the next couple of weeks.  Mt. Garfield Greenhouse recently opened for the 2014 season.  Garden season is right around the corner!

Leave a comment

Filed under amendments, General gardening, vegetable gardening

Heidi Mae’s Garden: Harvest

Here we are mid September.  Where did the summer go?  This time of year I can barely keep up with the produce coming out of my garden.  I confess to a huge pile of zucchini and patty pan sitting on the counter and a big bag of beans in the fridge; waiting patiently to be dealt with.  So pretty though, right?!

baskets

bounty

Needless to say, I’ve been busy.  Tomatoes, including cherry tomatoes, are washed and frozen to make sauce later as soon as they are picked.  I have kept up (sort of) with basil; already making pesto for the winter.

pesto

I’ve already canned a batch of Dilly Beans with some of the beans and made a few batches of hummus.

dilly beans

I’ve roasted, steamed, peeled and frozen Big Jim chiles and poblanos.

roasting chiles

roasting poblanos

Peppers have been the star of my garden this year. I’ve made stuffed peppers a couple of times, and have otherwise kept up with them by leaving them in the garden until  need them.

valencia

peppers

Buttercups are starting to size up; I picked the first one last weekend.  They’ll keep for a bit, hopefully well after fall becomes winter.

buttercup

Thankfully, I’m staying ahead of squash bugs and horn worms, but a couple of my tomatoes caught a virus this year, cutting back my overall production there.  One was a Mortgage Lifter, the other a Cherokee Purple–both heirlooms and therefore a bit more susceptible to such things.  The fava bean experiment has ended.  Even after the construction of a shade structure and hand watering, they weren’t happy, refused to set and got black on the edges.  I admitted defeat and pulled them out.  My potatoes died back, so they’ve been dug as well, with a much happier outcome than the poor little favas!

I’m alternately dreading the impending frost (Still have lots of green tomatoes!) and kind of looking forward to it (kinda ready to be finished with the “putting up” part, what AM I going to do with all this squash?!).  I know I’ll miss having fresh veggies anytime I want them.  But, everything that gets canned and frozen now will bring happy memories and flavors of warmer days when the snow flies.  Fingers crossed for a late frost.  🙂

Previously,  in Heidi Mae’s Garden:

Getting Started

Sprouting

Goodbye Cool Season, Hello Warm Season

Bring on the Heat

Midsumer Fantabulosity


Leave a comment

Filed under General gardening, pests, squash bugs, tomatoes, vegetable gardening

Heidi Mae’s Garden: Midsummer Fantabulosity

Monsoon season has given us a break from the 90s and 100s and the garden is lovin’ it!  It’s all about production right now; what all the work and care and squash bug hunting was hoping to achieve.  So lovely to head out in the cool of the morning, harvest basket in hand, and “shop” in the freshest produce market around.  I’ve been cooking with my fresh veggies, roasting, peeling and freezing green chiles and washing and freezing tomatoes to make pasta sauce later.

beans

beets

big bertha

roasting chiles

20130806_172418

20130805_114200

I talk to my plants as I harvest, tress up, and pluck bugs.  “Aren’t you beautiful!”  “Oh look at how much you’ve grown!”  “Why hello there, zucchini!”  I think they like it.  I don’t care if the neighbor kids catch me.  Not even worried that you think I’m crazy, because I bet at least some of you do the same thing.  🙂

Gardens are really, really pretty; overall and close up.  My garden tends to look a bit formal, being in raised beds.  However, you know how some plants can be, spreading their seeds everywhere.  I allow a few of those seeds to stay where they land.  The volunteer dill, hollyhock, marigolds, and sunflowers add a bit of wildness I like.  Here’s a little tour of my garden at the peak of its fantabulosity–Aug 7, 2013.  (Some of my squash are planted in between perennial in a different spot.)

garden 8-7-13

Aunt Ruby's German Greens

baby round zucchini

zucchini

basil

buttercup

coriander-cilantro seeds

dill

female patty pan flower

patty pan and male flower

patty pan jungle

grafted San Marzanos

hollyhocks and strawberries

marigolds

parsley

poblanos

royal burgundy beans

tomatillos

sunflower

How are your gardens?  What are you harvesting and enjoying right now?

Wanna see how this garden got started?  Check out other posts from Heidi Mae’s Garden:

Getting Started

Sprouting

Goodbye Cool Season, Hello Warm Season

Bring on the Heat

1 Comment

Filed under General gardening, vegetable gardening

Heidi Mae’s Garden: Bring on the Heat!

Hello, Virtual Gardening Friends!  Temperatures have been climbing steadily since I last checked in.  For some plants, this is not good; my peas finally browned out and I pulled them out this week.  However, warm season veggies like tomatoes, peppers and peas, love that nighttime temperatures are staying warm.  I’ve harvested quite a few cherry tomatoes and a few San Marzanos.  Here’s a pic of the garden as of July 9, 2013.  You can see a newly-constructed shade thingie over the favas.  These poor beans are really hating on the hot temps here, so we’re trying to help them out with some shade.  Keeping my fingers crossed for at least a few beans!

the garden 7-9-13

The beans are blooming and will set in no time.  I plant Royal Burgundy bush beans.  The flowers and beans are beautifully purple–making harvesting easier.  They turn green when cooked.  Aren’t the flowers pretty?  Here’s a pic of the bean and potato bed as well. The dill plants itself and comes up everywhere!

royal burgandy flower

beans and potatoes

Peppers are setting, sizing up and getting pick-able!  Here are examples of Big Bertha bell peppers, Big Jim chiles, and Goliath jalapeno; aren’t they pretty?!

big bertha

big jim

goliath jalapeno

Cilantro is in full bloom.  I cut some of it back to give my poor Goliath jalapenos some light and space, but I’m leaving some of them to seed another crop for this fall.  Green onions are also in this bed–they’re getting huge!  I planted another pack of them this week; this time planting in “bunches” instead of individually, just to see how that works.

cilantro

onions

Beets are doing great, but needed thinning.  I pulled quite a few, washed and chopped the greens and sauteed them with garlic–yum!

beets

Tomatoes are topping their tomato ladders.  The grafted San Marzanos are loaded with green tomatoes, and starting to ripen near the bottoms of each plant.  Grafted Mortgage Lifter has set tomatoes, as have the Aunt Ruby’s German Green and Cherokee Purples I planted from seed.  The warm weather has the seeded tomatoes almost caught up to the tomatoes I bought in gallons from the Greenhouse.

tomatoes

san marzano

I have some squash planted in pots in the garden, and quite a few out in a perennial bed that had some big “holes” from perennials that didn’t survive last winter’s cold.  They’re beautiful plants with pretty blooms that look rather nice in among the perennials.  This year I planted baby round zucchini–a ball-shaped heirloom–just to see how I like them, and to see if I can stay ahead of them easier than regular zucchini, and patty pans–golden scallops–the one that look like flying saucers, and buttercup–an acorn-like winter squash that is easier to stuff because it has a flat bottom.  I got these out really late, and have just now picked my first round zucchini, along with the first squash bugs.  Yay zucchini, boo bugs.

baby zucchini

zucchini

buttercup

That’s about it for now.  My basil needed pinching back today, so I’m enjoying a refreshing basil lemonade as I write today.  What’s one of your favorite garden snacks?

Here are quick links to the other posts from Heidi Mae’s Garden this year:

Getting Started

Sprouting

Goodbye Cool Season, Hello Warm Season

2 Comments

Filed under General gardening, onions, squash bugs, tomatoes, Uncategorized, vegetable gardening

Ewwww! Squash Bugs!

Last night on Facebook, a discussion started with a friend who has already found squash bugs on her squash.  The discussion continued this morning, with so many participants I felt it was time to talk squash bugs.

Squash bugs are those flat, gray, sideways-crawling, continual egg-laying beasties that can suck a squash plant dry seemingly overnight.  The resulting damage is a completely wilted plant that blackens and dies, often with a perfectly healthy plant right next to it.  They will attack any plant in the curcubit family (cucumbers, melons, summer squash, winter squash and pumpkins), but seem to prefer squash and pumpkins.  They emit a strong odor when crushed, which may have something to do with the lack of natural predators.  Without help from birds, lizards and toads, gardeners must take the front line in defending your crops against the invading army of squash bugs.  This is a bug I hand-picked (ewwww!) from a squash and threw on the gravel for its photo op.  I then stepped on it.  This was before I discovered the duct tape solution; I’ll tell you about that later in this post.

squash bug

Squash bugs can overwinter in the top six inches of soil, under firewood, within garden debris, under stones or dirt clods, or any other protected place near your garden, emerge in the spring and start laying eggs just as you start planting your little squash babies.  The first step to controlling squash bugs begins with careful garden clean-up in the fall.  Theresa from Tending My Garden suggests the following:

  • “Before removing the plants from the garden, I want to kill as many squash bugs as possible. I pull the plants up and leave them — along with any damaged fruits —in a pile on the garden bed. Since squash bugs have a tendency to stay with the vines even after they wilt and reduce in mass, I’m able to check every day for more adults and nymphs – killing all I find.
  • I  also look for eggs and remove those. (I tear them off, take them with me, and throw them in the trash.  They’re next to impossible to crush. So I take no chances of having them hatch anywhere in my yard or garden.)
  • Usually it takes about a week before I can’t find anymore bugs. Then I remove the plants and any damaged fruits from the garden.
  • By killing as many as you can and removing the food source (the finished plants) from the garden you greatly reduce their chances to make it through the winter. Lowering the numbers that survive is your first step in keeping the prolific squash bug under control.”

The following spring, you should be ahead of the game where squash bugs are concerned, but a few will have escaped your careful cleaning–they are excellent hiders!  Your next line of defense will be to sprinkle diatomaceous earth, if you’d like to stay organic, or an insecticide granule with bifenthrin, such as Fertilome’s Vegetable and Ornamental Insect Control, around the base of each squash plant.  Diatomaceous earth must be reapplied if it gets wet.  Both of these can help control the adult insect.  You might also place a board or shingle near the base of the plant.  Squash bugs will congregate under them, making it easier to find and squish them.

Companion plantings can also help reduce (but not eliminate!) the numbers of squash bugs.  Tammy Biondi writes in Life123 that “catnip, tansy, radishes, nasturtiums, marigolds, bee balm and mint” can be planted near your squash to help repel squash bugs.

A suggestion that came up with last night’s Facebook discussion was using wood ash at the base of the plants.  I’ve never tried it and couldn’t find another source to verify it, but the writer says it works.  Wood ash is alkaline, so be careful with it if your soil is already alkaline.

Some squash bugs will still escape all of your efforts, so it’s important to be vigilant!  Check your plants daily for eggs.  Squash bugs lay their tiny, bronze, football-shaped eggs near the intersection of veins on the underside of a leaf.

squash bug eggs

Removing the eggs and crushing or disposing of them is imperative.  My favorite egg removal tool is duct tape.  Stick the tape on the section of leaf with eggs and gently pull it away.  The eggs will stick to the tape without damaging the  leaf!  Duct tape is also useful in removing a hatch of squash bug nymphs AND can also be used to capture adults!  Duct tape comes in lots of pretty colors and patterns, and you can wear it on your wrist like a bracelet. Fashionable, deadly to squash bugs and satisfying for the gardener.  🙂  Hand picking and squishing the beasties and their eggs is icky, but works.  Watering the stems at the base of the plant will send adults scurrying for higher ground, making them easier to catch.

As a word of caution, bees are important pollinators for your squash plants.  Insecticides will kill bees, so be careful to not apply them when bees are active.  Read labels and follow instructions.  If you choose insecticides, be sure to select those that are labelled “safe” for food crops.

Good luck to you, fellow squash bug warriors!  The battle will be long, and at times difficult, but you can prevail to have more zucchini than you can possibly use!  Be watching the recipe page of this blog for ways to use up your bountiful squash harvest and hopefully prevent you from leaving baseball bat-sized specimens in unlocked cars…..   🙂


1 Comment

Filed under General gardening, pests, squash bugs, vegetable gardening

Heidi Mae’s Garden: Goodbye Cool Season, Hello Warm Season

Here we are in mid June.  Daytime temperatures have been in the 90s, and overnights in the 60s.  It’s certainly feeling more like summer than spring, and cold season veggies think it must be time to make flowers.  Lettuce, spinach, arugula, radishes, and cilantro might be elongating and starting to flower–a process referred to as bolting.

For cilantro, this isn’t necessarily a bad thing.  Allowing it to flower will result in seeds which are the herb coriander and can be dried and ground.  Or!  Let the seeds fall.  They’ll germinate and produce a second crop of cilantro for you!  This is the cilantro in the demo garden at the Greenhouse.

demo cilantro

Other cold season crops become bitter as they put their energy into flowering.  I got a final clipping of my greens and pulled up those plants, as well as the radishes.  I washed everything and have been enjoying my last fresh salads until fall, when I can plant a few seeds for the second cool season of the growing season.

salad

Pulling out my cool season veggies left me space to plant a few more warm season crops:  additional tomatoes, squash and cucumbers.  Warm season crops such as these enjoy the warming temperatures; blooming and setting fruit.

Bell peppers and tomatoes are sizing up.

peppers

san marzanos

There’s a Sun Sugar almost ripe!  Squeeeee!  Sun Sugar is a favorite around the Greenhouse.  They’re so sweet and yummy, I end up eating a bunch of them before they get into the house!  Early ripening cherry tomatoes are great for anyone with a short growing season.

sunsugar

Here’s a pic of how my garden looks this week.

garden 6-13-13

You may notice some unfamiliar plants in the same bed as the peas.  They’re fava beans!  I LOVE fava beans, so I’m making the mad attempt to grow them here.  They much prefer the cooler temperatures of California’s Bay Area.  The Grand Valley’s hot summers will make them a bit of a project–we’ll see how it goes.  I’m thinking some sort of a shade structure may be in order.

How are your gardens faring with the hot, dry and WINDY weather?  You may be noticing some dry, brown and crispy leaf edges on your tomatoes and peppers as a result of the wind.  They’ll come out of it just fine, no worries.  🙂

3 Comments

Filed under General gardening, tomatoes, vegetable gardening

Heidi Mae’s Garden: Sprouting!

It’s been a little over three weeks since I got my garden started; it’s looking happier all the time!

garden 5-18-13

A lot has happened in the time since I blogged last–from my garden journal:

  • April 29:  Arugula and lettuce sprouted 
  • May 2:  Basil sprouted in my unheated greenhouse, and radish sprouted outside.  Everything survived 2 freeze warnings
  • May 3:  Buttercup squash in the greenhouse sprouted, beets and spinach sprouted outside.  I seeded Cherokee Purple tomatoes in the greenhouse, expecting them to sprout between May 8 and 13
  • May 4:  Round zucchini and California poppies sprouting in the greenhouse, peas outside
  • May 7:  Aunt Ruby’s German Green tomatoes, cilantro and patty pan squash sprouted in the greenhouse
  • May 13:  Cherokee Purple and parsley sprouted in the greenhouse
  • May 14: Potatoes finally showing a bit of green above the soil
  • May 15:  Peppers, tomatillos, tomatoes from MGG planted, cauliflowers starting to form
  • May 18:  The first strawberry!
  • May 19:  Planted green beans and fava beans (an experimental crop!)  Expecting beans to sprout in 10 days.

“Cold season” crops were planted outside toward the end of April, while warm season crops were planted in my unheated greenhouse.  Because it’s unheated, I wait to plant in it until most frost danger is past.  A greenhouse gets enough light to keep seedlings nice and stout, and I start a variety of warm season crops in there, growing plants for myself and my neighbors’ gardens.  Warm season crops should NOT be planted outside until frost danger is past; for the Grand Valley that’s usually Mother’s Day weekend.

In the greenhouse, I seeded most everything April 26 (later than I usually seed due to the cold spring) and by May 8, most had sprouted.

greenhouse sprouts

True leaves were appearing by May 18.

seedlings

When seeds sprout, the first leaves are the “seed leaves,” because they come from the sides of the seed.  (Corn is a bit different, it only has one seed leaf.)  True leaves are leaves typical for the particular plant–the ones you recognize as squash or tomato or lettuce.  Look for the seed leaves and the new true leaves of these squash and tomatoes.

squash true leaves

tomatoes true leaves

Let’s look at some baby pictures from May 8 (the first) and see how they’ve grown by May 18 (the second).  First the arugula.

arugula

arugula

Now beets.  This is my first time planting beets; so far they’re pretty slow-growing.

beets

beets

Here’s lettuce.

lettuce

lettuce

And sugar snap peas.  I need to get a trellis for them to climb on soon!   I planted tomatillos in the same bed.

peas

peas and tomatillos

Here are the radishes.  They’ll get thinned as I pull them to munch on.

radishes

radishes

Let’s check in with the potatoes.

potatoes

Here’s my pepper bed.  I have green, orange, gold and red bell peppers, Big Jims, and poblanos planted in the same bed as the green onions.

peppers and onions

I’m trying grafted tomatoes this year!  I chose San Marzanos–paste tomatoes, and Mortgage Lifter–an heirloom that makes huge tomatoes that when they were first bred, were popular enough to pay off the originator’s mortgage!  I’ll plant the Cherokee Purples and the Aunt Ruby’s German Greens when they’re ready to be outside in this bed as well.

tomatoes

The marigolds are there because I like them, and because they help keep bugs away.  How is your garden growing?


3 Comments

Filed under General gardening, onions, tomatoes, vegetable gardening